How to make easy and adorable Easter chocolate covered pretzel bunnies and ducklings!

This post may contain affiliate links. Please see my full disclosure policy for details.
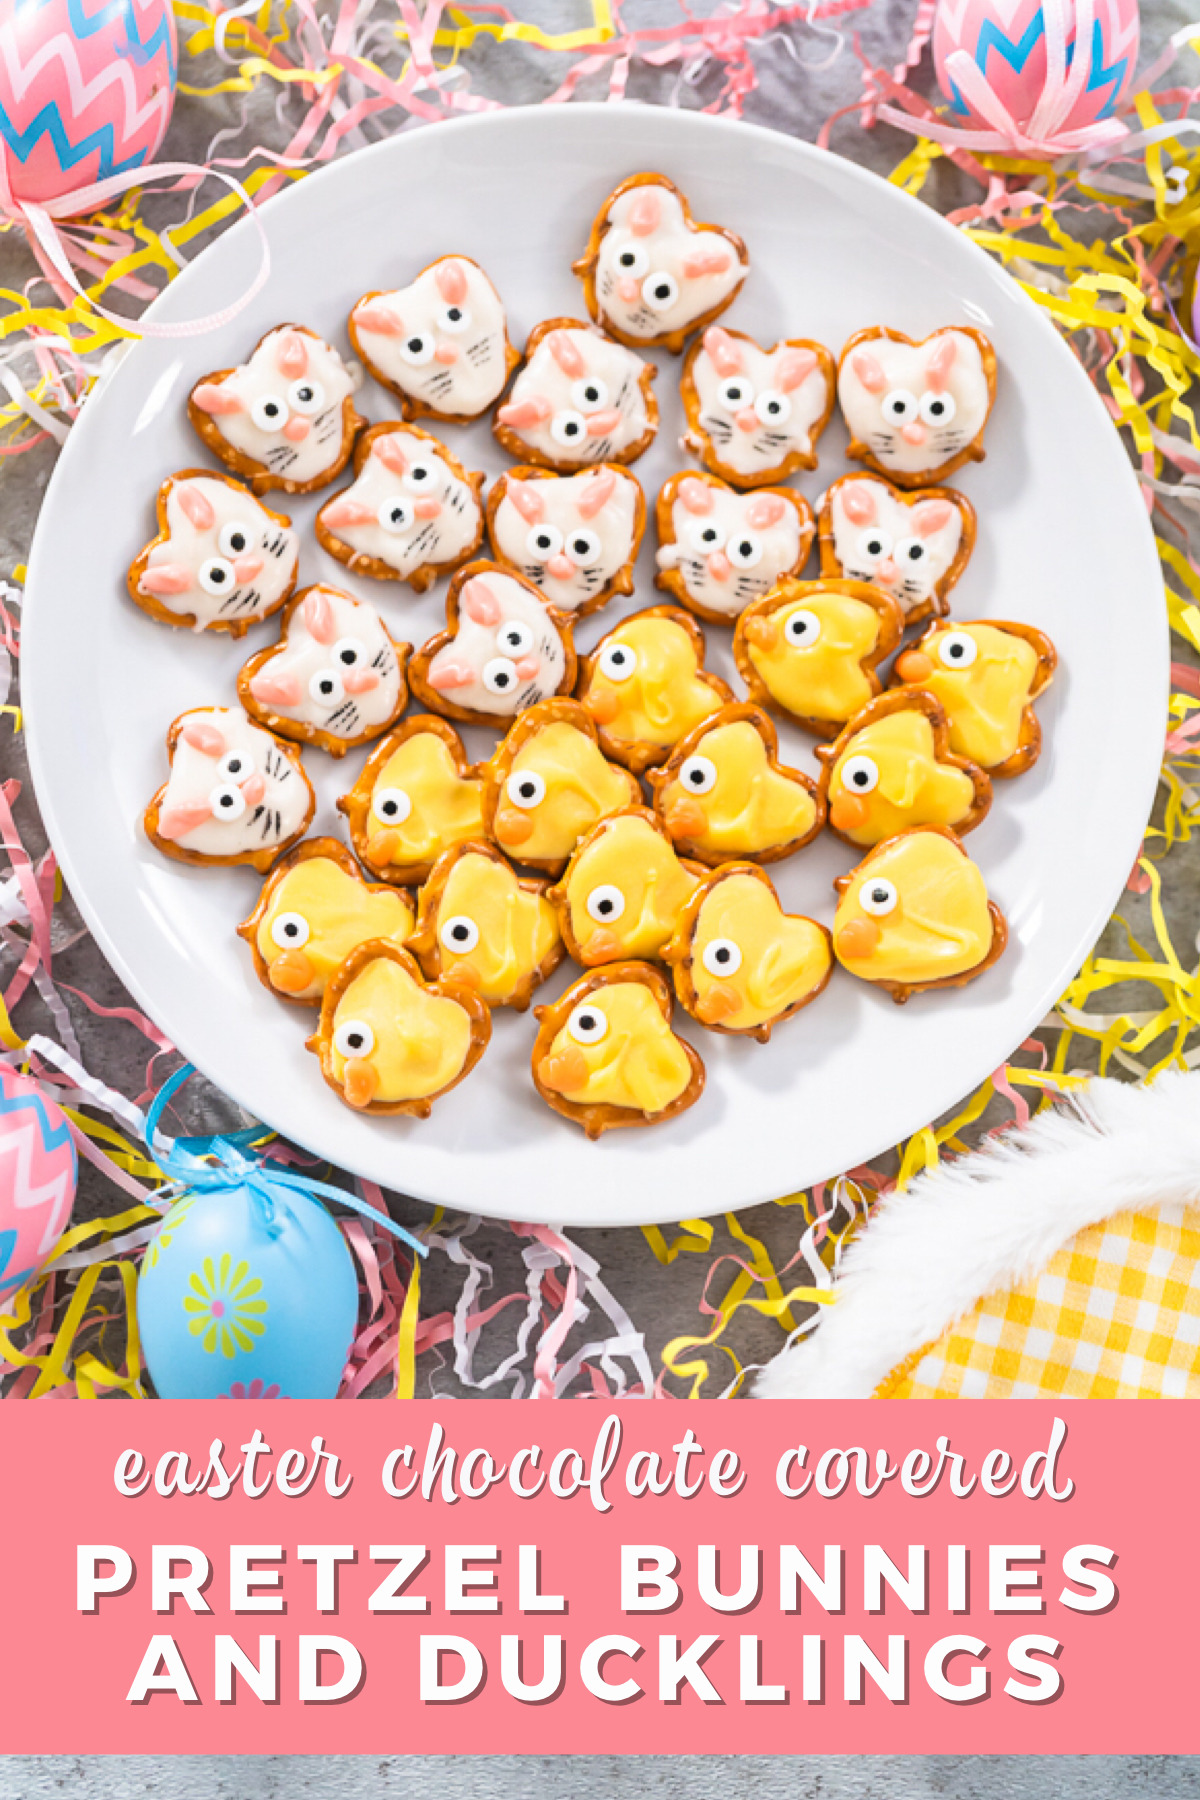
One of the best things about spring- besides Easter, of course- is the refreshing feeling of new life popping up all around. From fragrant flowers to fuzzy little baby animals, spring brings us all kinds of new beings. Wouldn’t it be kinda fun to bring some of that adorable new charm to your Easter celebrations? How about with some little bunnies and ducklings? No, don’t panic! I don’t mean to go out and get some new pets. I’m talking about making some adorable yet devourable homemade snacks like these Easter Chocolate Covered Pretzel Bunnies and Ducklings!
Not only are these salty sweets magical, to say the least, but they are simple enough to make that you can easily turn this into a fun family Easter project to do with kids of all ages! And you don’t have to worry too much about your kiddos sneaking a few of these before the guests arrive because this recipe makes enough to share with a large family or small crowd of loved ones! I even like to set aside a few of these chocolate pretzels to add a little spring magic to my daughter’s school lunch box by surprising her with a small sweet treat.
So whatever your Easter plans are, whether it’s a big family celebration, a sweet treat to surprise your little ones with, or a neighborhood egg hunt, these hand- crafted Easter chocolate pretzels are sure to bring a little spark of springtime magic!
Candy- Coating Equipment
These satisfyingly sweet Easter treats can easily be made with common household kitchen tools that you may have already. However, to make this process go smoothly, quickly, and end with minimal clean up afterwards, I use a few special tools and equipment made specifically for candy projects like this.
- Wilton candy melts pot
- Spatulas
- Piping bags
- Piping bag ties
- Dual Melting Pot Insert
- Baking sheet
- Parchment paper sheets
- Black food pen
Helpful Kitchen Tip:
I specifically like using my candy melt pot over all other melting methods, including the microwave, for all of my candy- making projects. It keeps the chocolate at the perfect temperature through the whole process without ever overcooking the chocolate. Plus the silicone lining is super easy to clean, especially since there are no overcooked bits of candy to try and scrape off later.
Melt- worthy Ingredients
For this egg-citing kitchen activity you will only need a handful of yummy, sweet and salty ingredients. The end result? Easter treats that are so cute and so tasty that they are pretty much guaranteed to make you and your little ones melt.
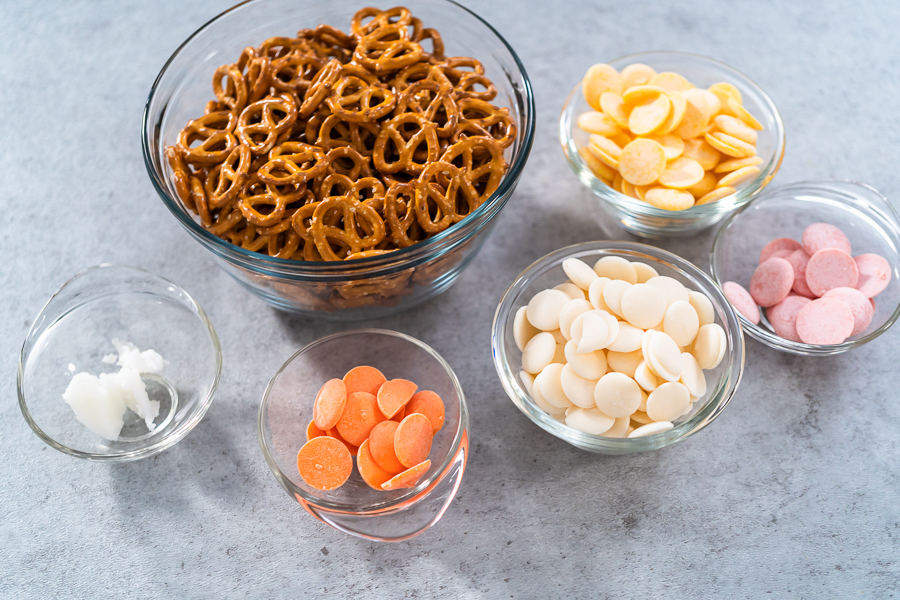
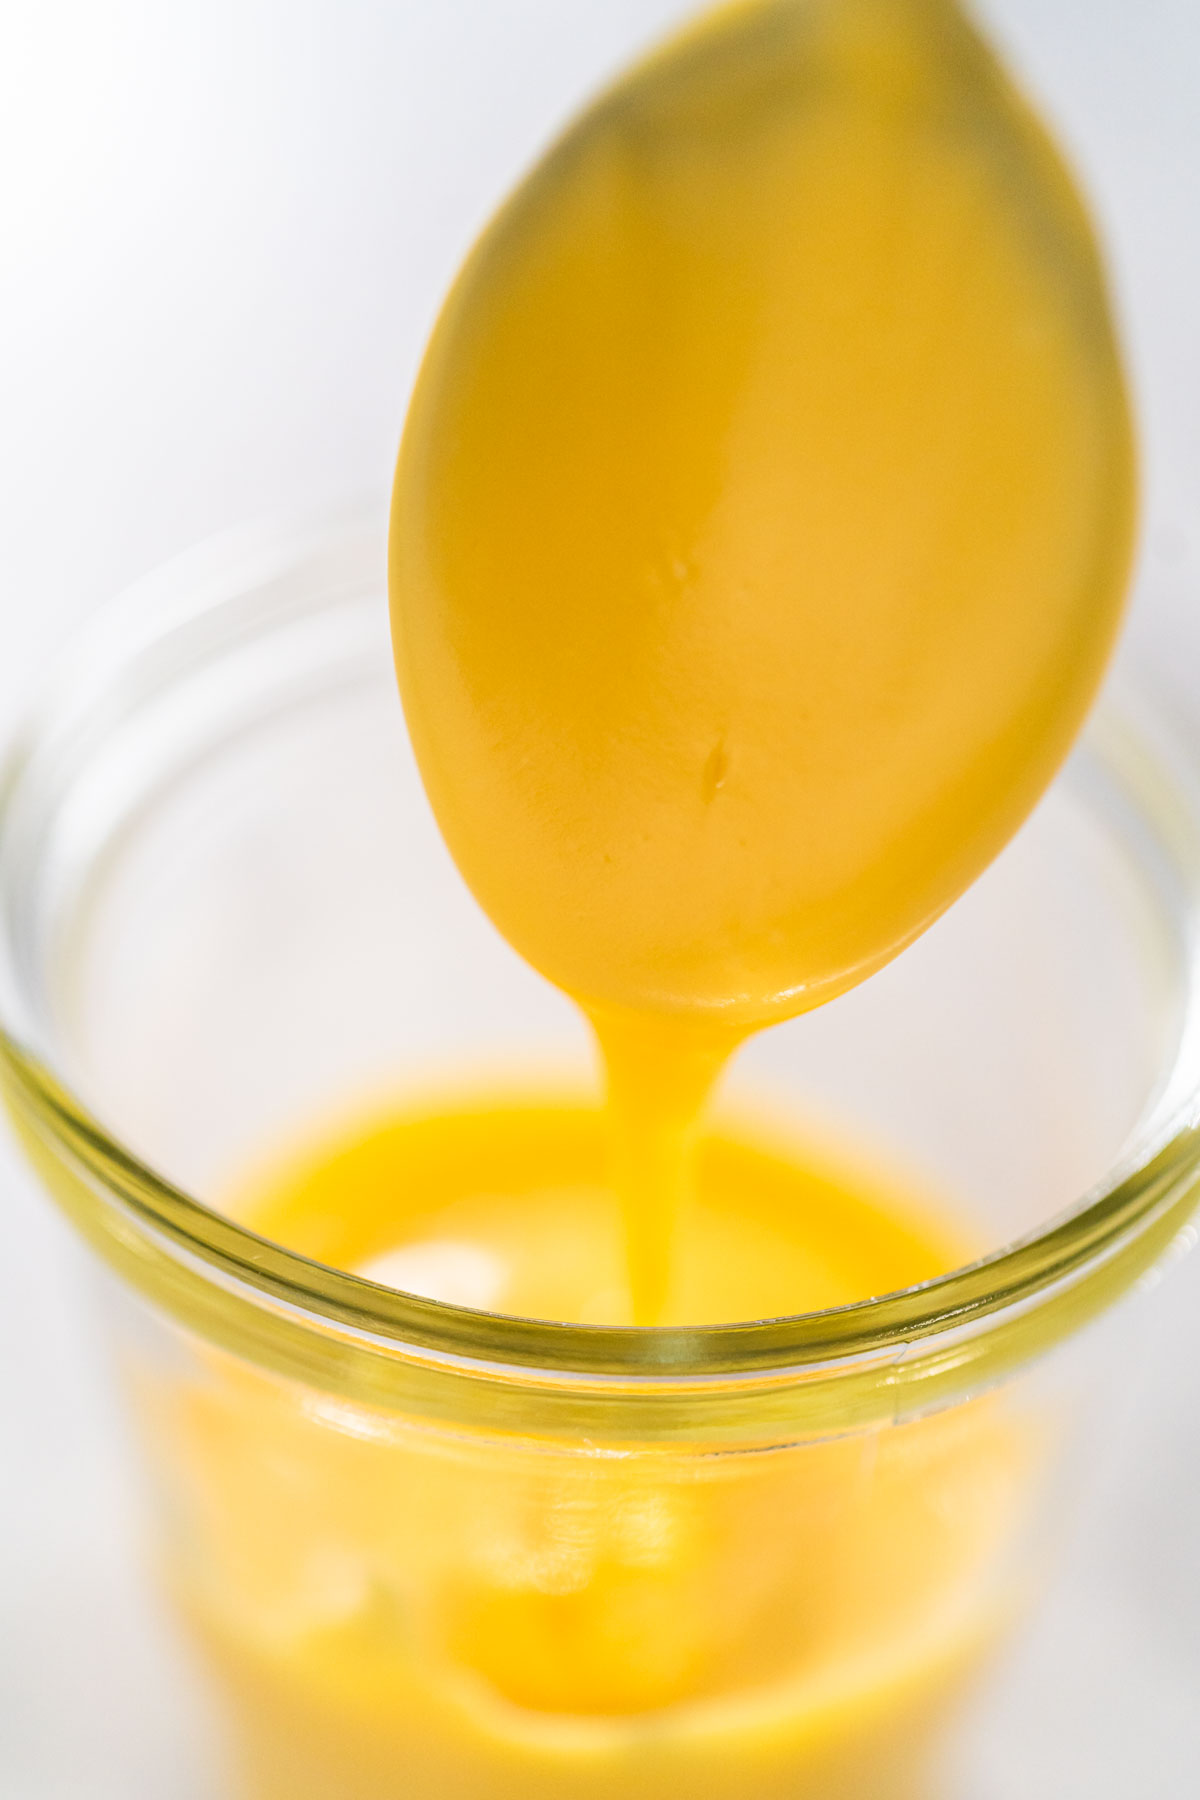
- ½ cup Yellow candy melts
- ¼ tsp Coconut oil
- ½ cup White candy melts
- ¼ tsp Coconut oil
- ¼ cup Orange candy melts
- ⅛ tsp Coconut oil
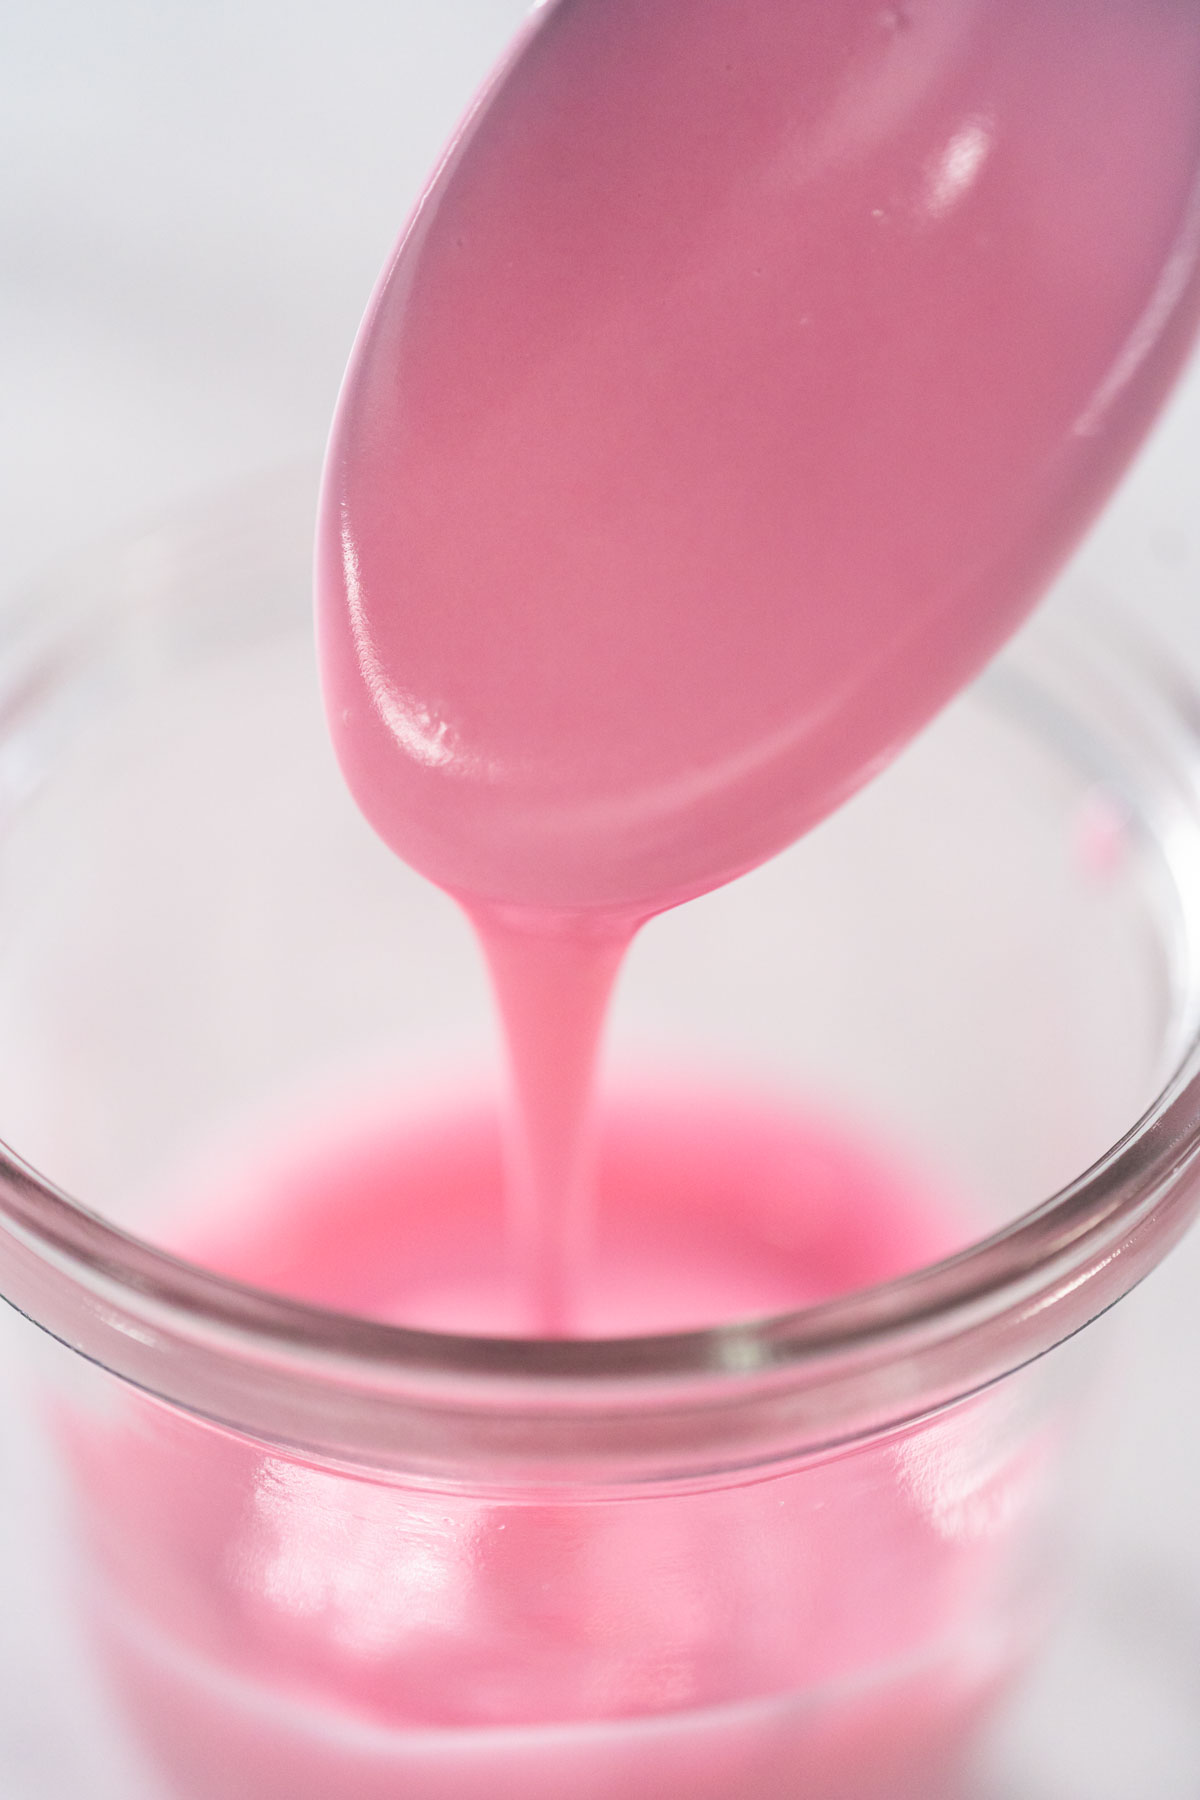
- ¼ cup Pink candy melts
- ⅛ tsp Coconut oil
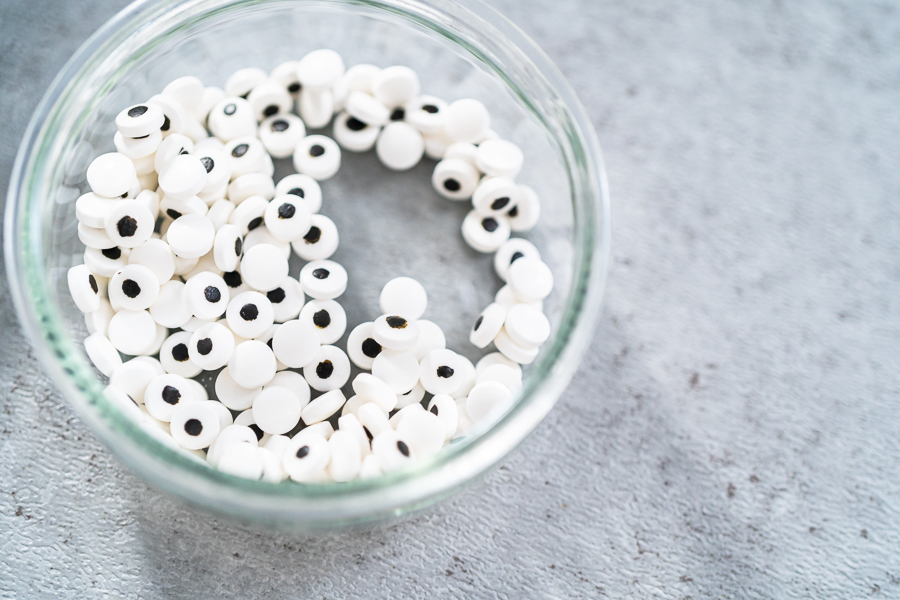
- 1 bag Mini Candy Eyeballs
- 1 bag Mini pretzels
Making Chocolate Covered Pretzel Bunnies and Ducklings for Easter
Time to get down to the candy- making bliss! Here is how to make these chocolate covered pretzel bunnies and ducklings so you can bring a little touch of spring magic and charm to this Easter holiday.
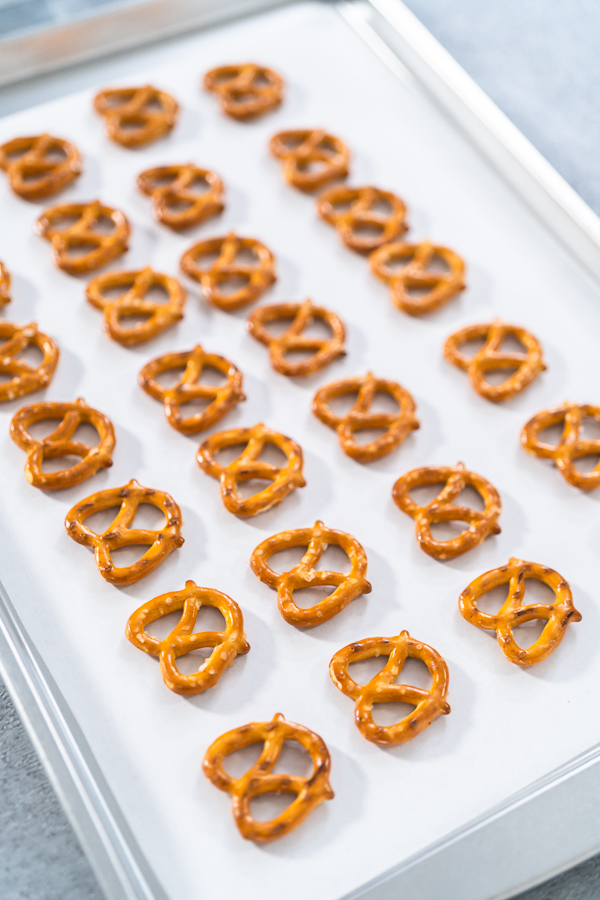
- First, prepare and measure out all of your ingredients. Then, go ahead and line a baking sheet with a parchment paper sheet or wax paper.
- Make sure the baking sheet you choose can fit flat in your freezer or fridge.
- I like to go ahead and pour my bag of pretzels into a large bowl for easier access when it’s time to line them out.
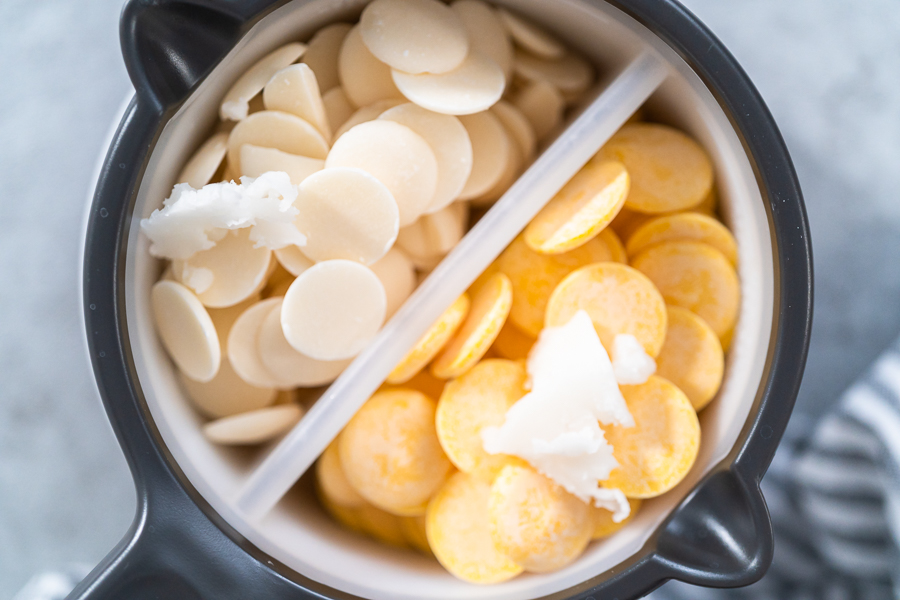
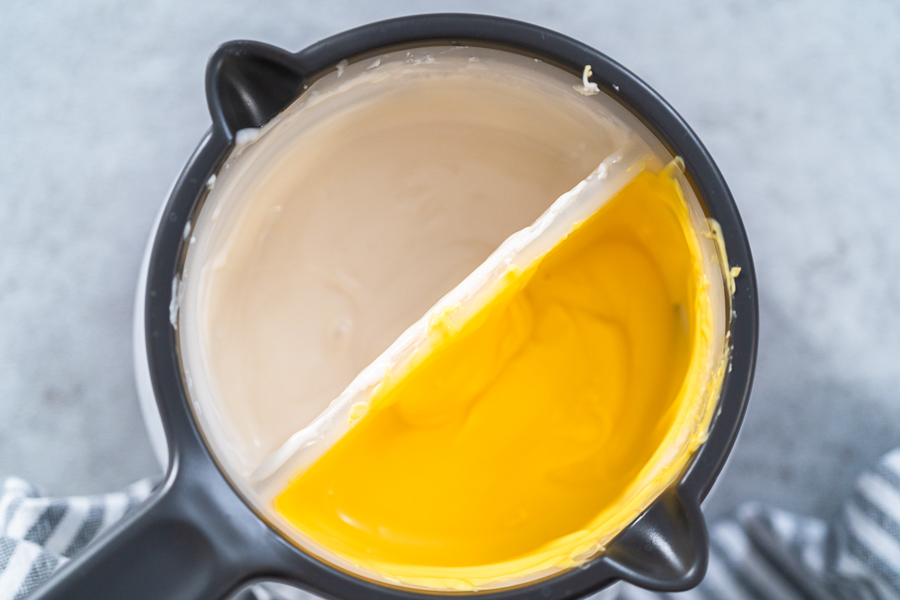
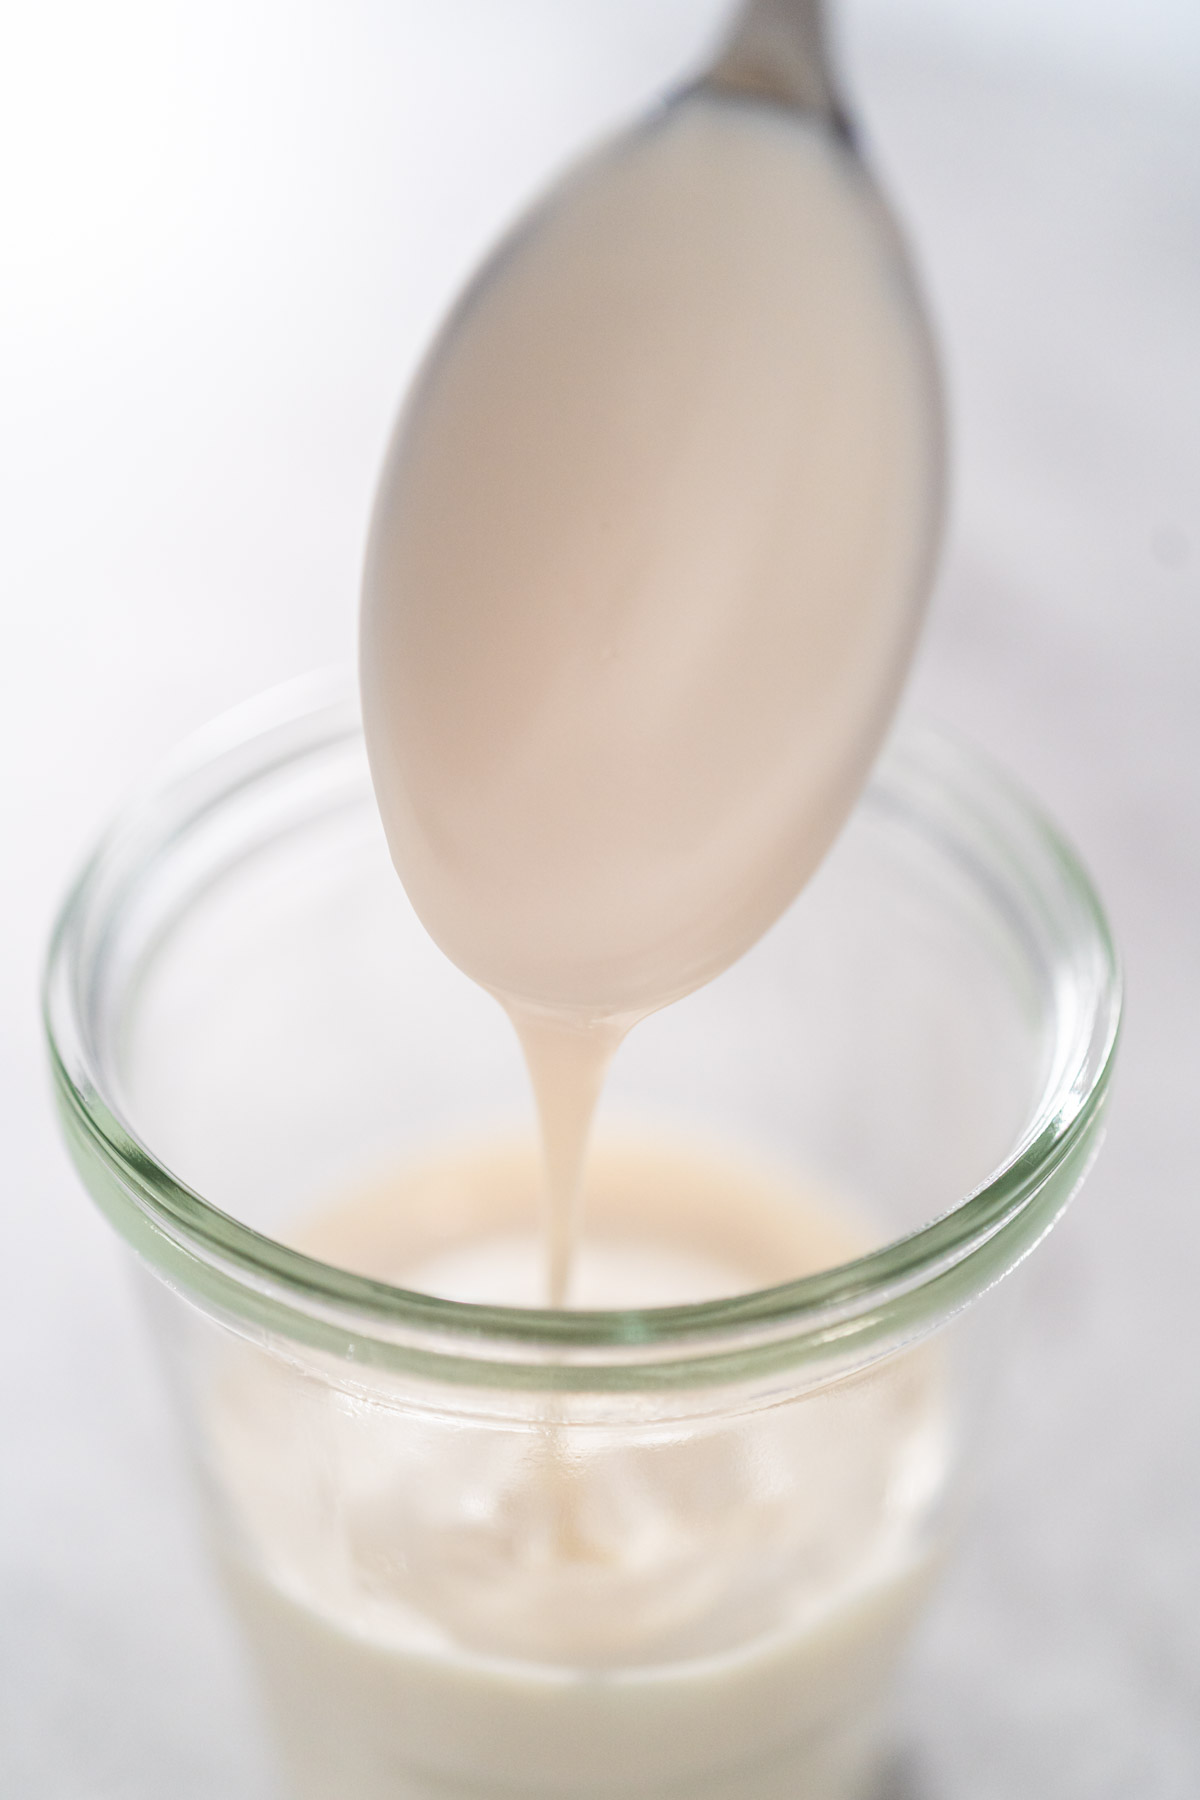
- Next, line the candy melting pot with the Dual Melting Pot Insert. Pour the white candy melts in one side and the yellow candies in the other side. Drop in the coconut oil to both the yellow and white candies.
- Melt the candies and oil together on high and stir regularly with separate heat resistant spatulas.
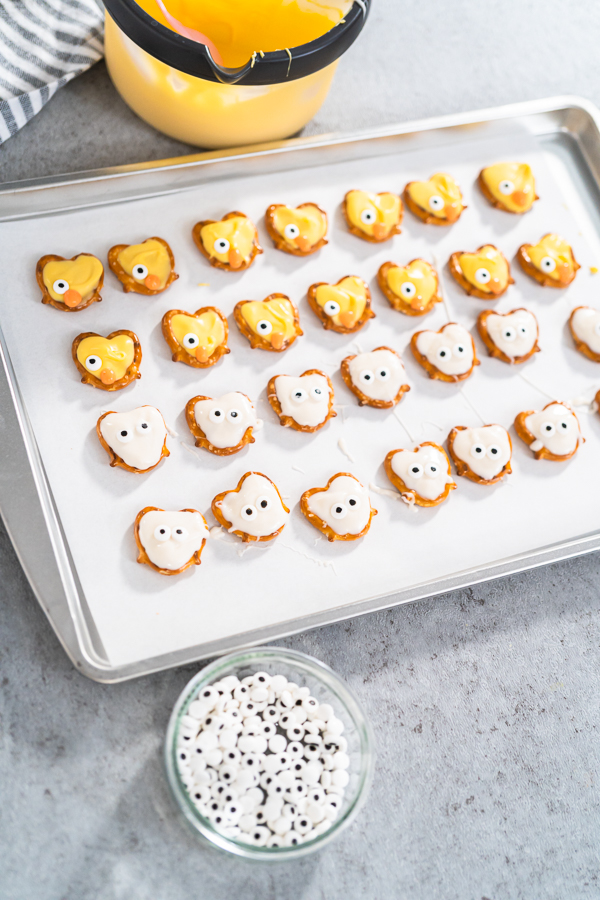
- Then, line several rows of mini pretzels along the parchment- lined baking sheet. When the candies have completely melted, it’s time to begin spooning the melted candy onto the pretzels.
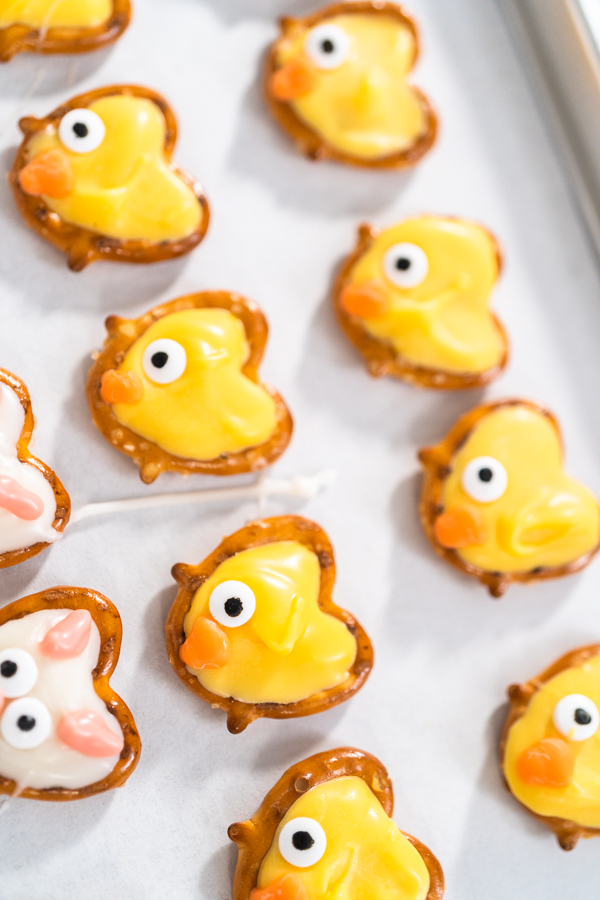
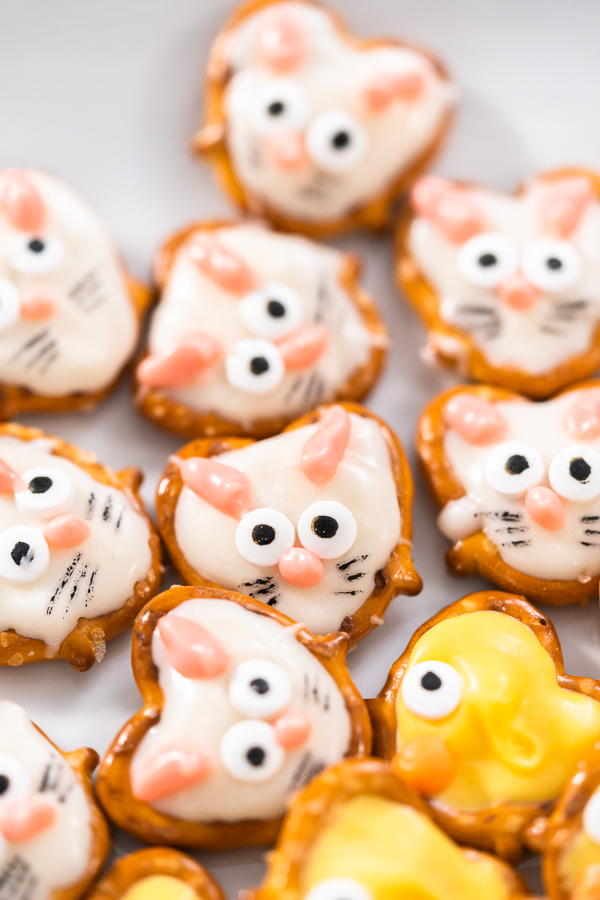
- Spoon the melted candy onto the pretzels 2 at a time, then immediately drop the Mini Candy Eyeballs into place before the candy has a chance to start hardening. Repeat this process until all pretzels are coated, then transfer them to the fridge for 10-15 minutes.
- When spooning the yellow candy onto the pretzels, lift up your spoon from the chocolate to create a little peak where the little duckling wing will go.
- Half of these pretzels should be yellow for the ducklings and the other half white for the bunnies.
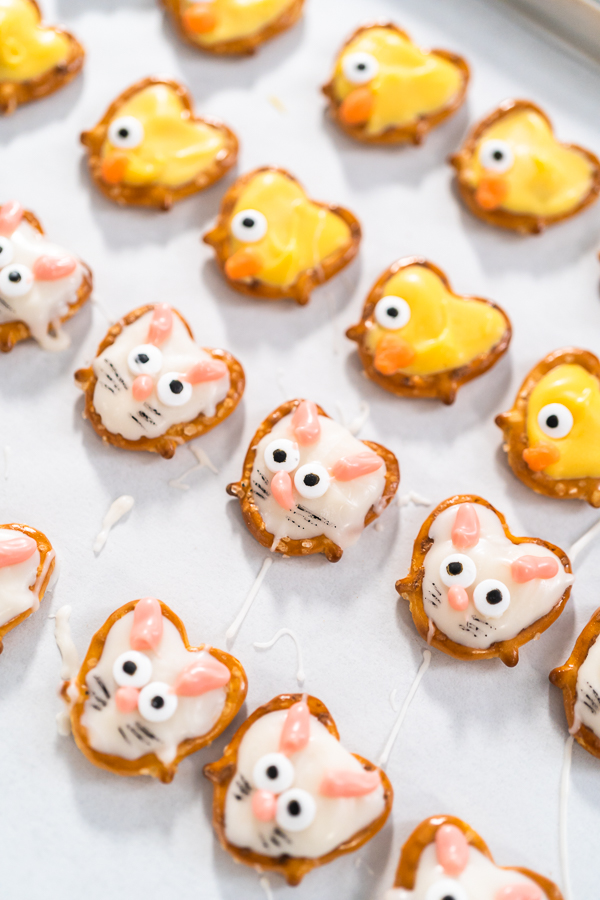
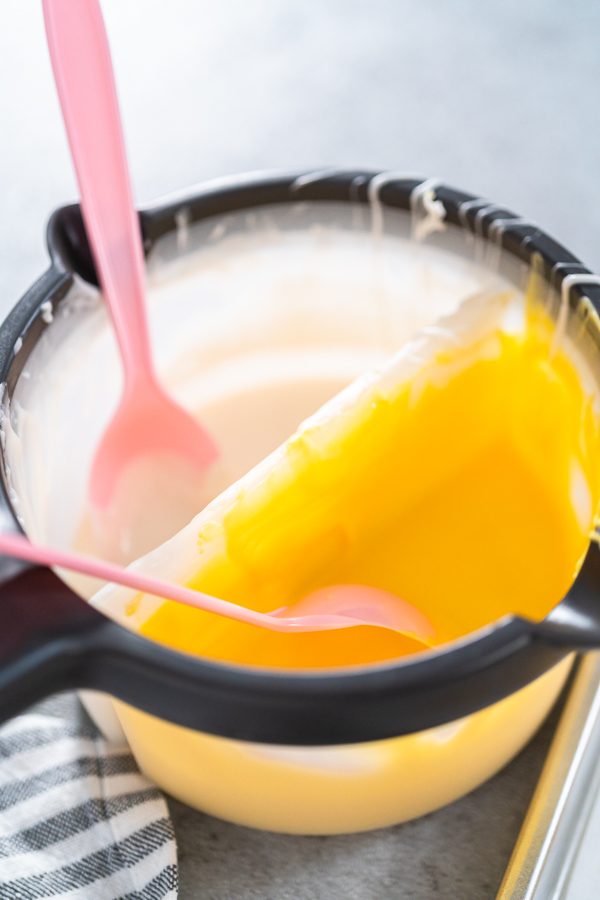
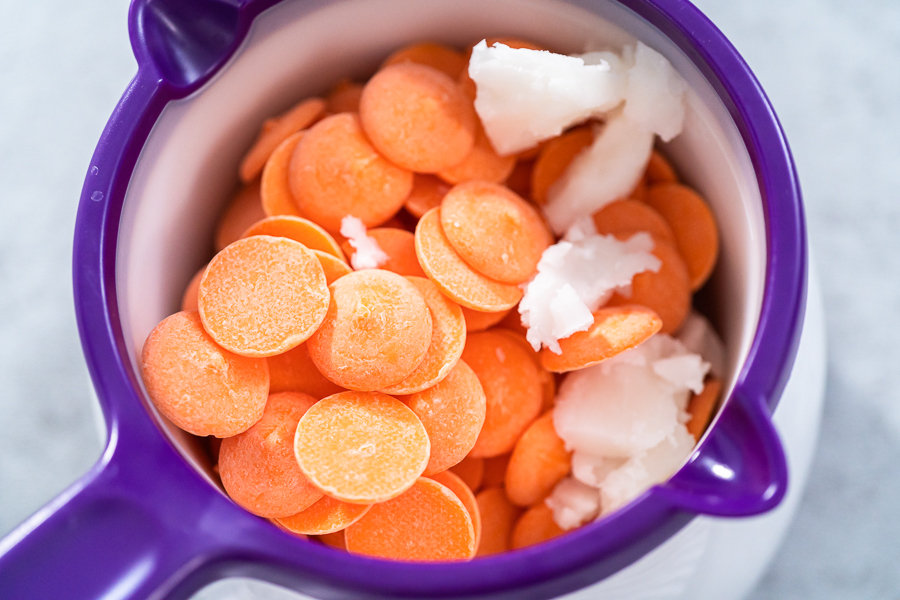
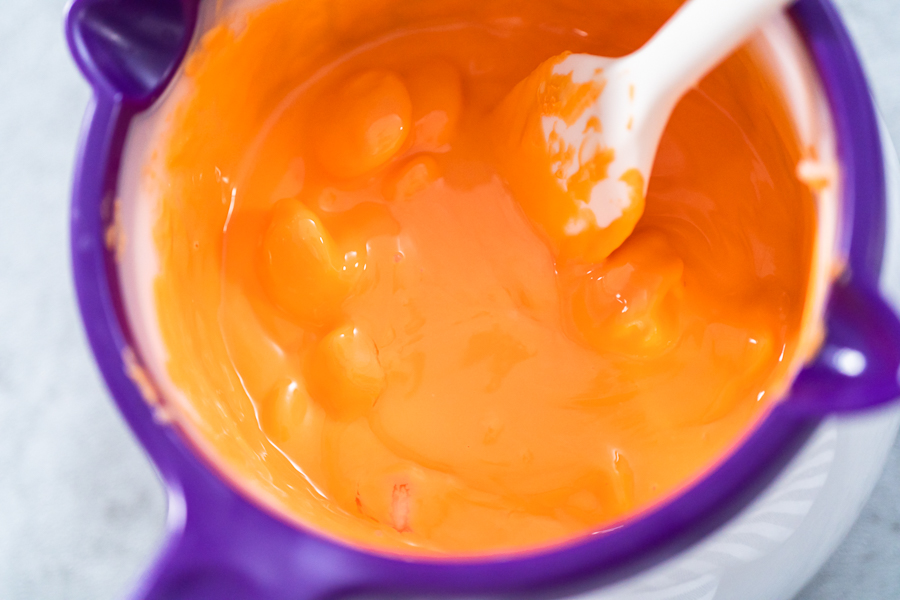
- Next, using a regular insert, melt the orange candies with some coconut oil in the candy melting pot.
- Melt them together on high and stir regularly with a heat resistant spatula.
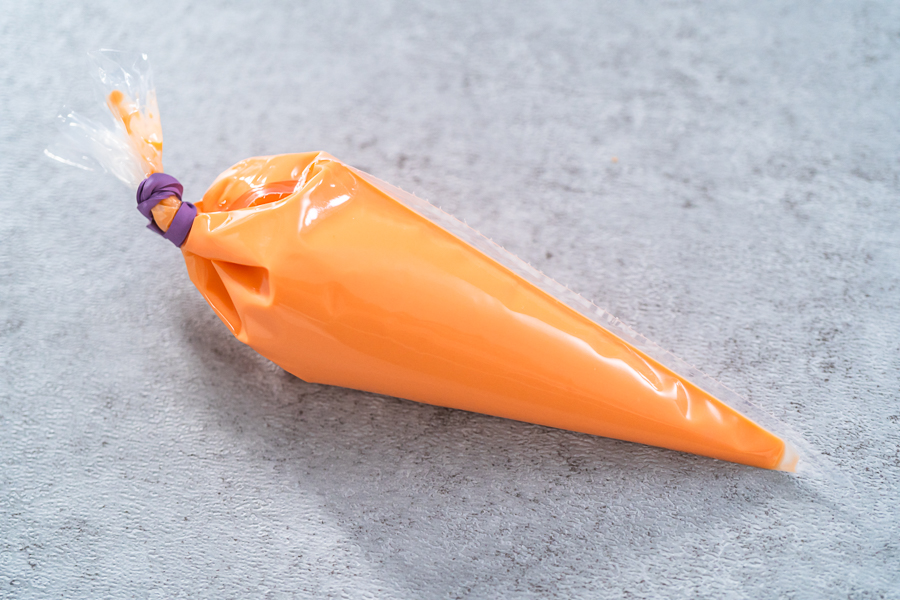
- Then, transfer the melted orange candy to a piping bag and tie it off with a piping bag tie. Cut ⅛ inch from the tip of the bag for easy drizzling.
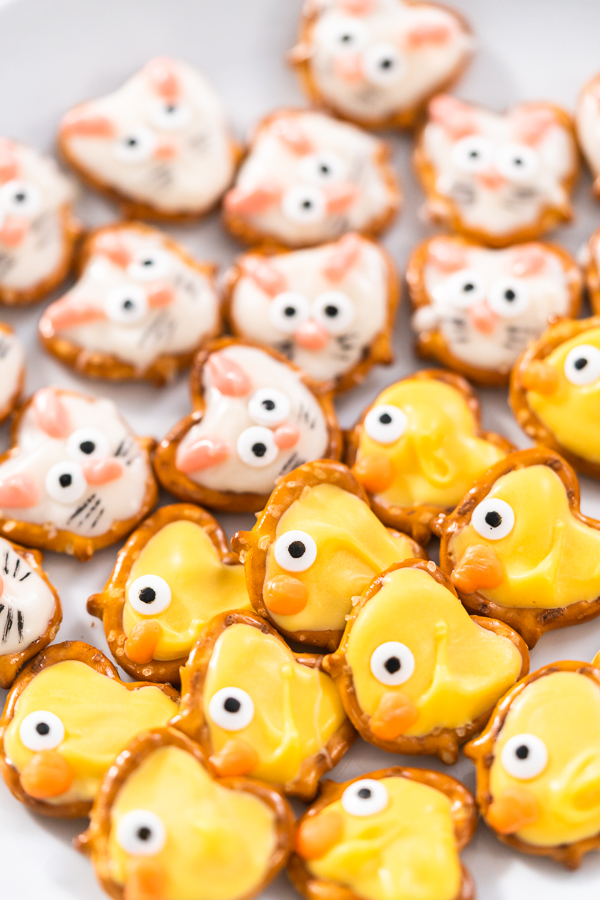
- Carefully use the piping bag of orange candy to draw little beaks onto all the yellow duckling pretzels. Then, rinse out the lining of the melting pot and repeat the candy melting process with the pink candy melts and coconut oil. Transfer the melted pink candy to another piping bag, just the same way, and use the pink candy to draw out the bunny ears and noses on the white candied pretzels.
- Let the candied pretzels harden in the fridge again for 10 minutes. Finally, after the candy has hardened completely, use the Black food pen to draw whiskers on the bunnies. Now you are ready to serve and enjoy!
Other Easter Recipes
Storing Candied Pretzels
Whether you are making these ahead of time for an Easter celebration or you need to save some of these leftover from the party, it is actually pretty easy to store them for later enjoyment! If you’re wrapping these up for party favors, try using some of these food- safe party favor bags.
- Transfer the candy- coated pretzels to an airtight container.
- You don’t want to store these in a bag due to the danger of the chocolate accidently chipping.
- If desired, you can separate layers with a sheet of parchment or wax paper to keep the pretzels from sticking together.
- Mark the date on the outside of the container.
- Store at room temperature or slightly cooler for 2- 3 weeks.
- I do not recommend storing these candied pretzels long-term in the fridge or the freezer due to the potential of the pretzels softening or going stale from moisture.
Sweet Easter Serving Ideas
Want to make a complete sweet treat extravaganza set up for your family’s Easter celebrations this year? Then here are some of my other favorite Easter recipes for you to try! These are all perfect for enhancing this refreshing time of year and adding to that fresh feeling of spring through delicious, sweet, hand- crafted desserts.
Serve these Easter pretzels with:
- On an Easter Charcuterie Board
- Easter Chocolate Covered Pretzel Carrots
- Lemon Bundt Cake
- Italian Easter Bread
- Italian Easter Mini Breads
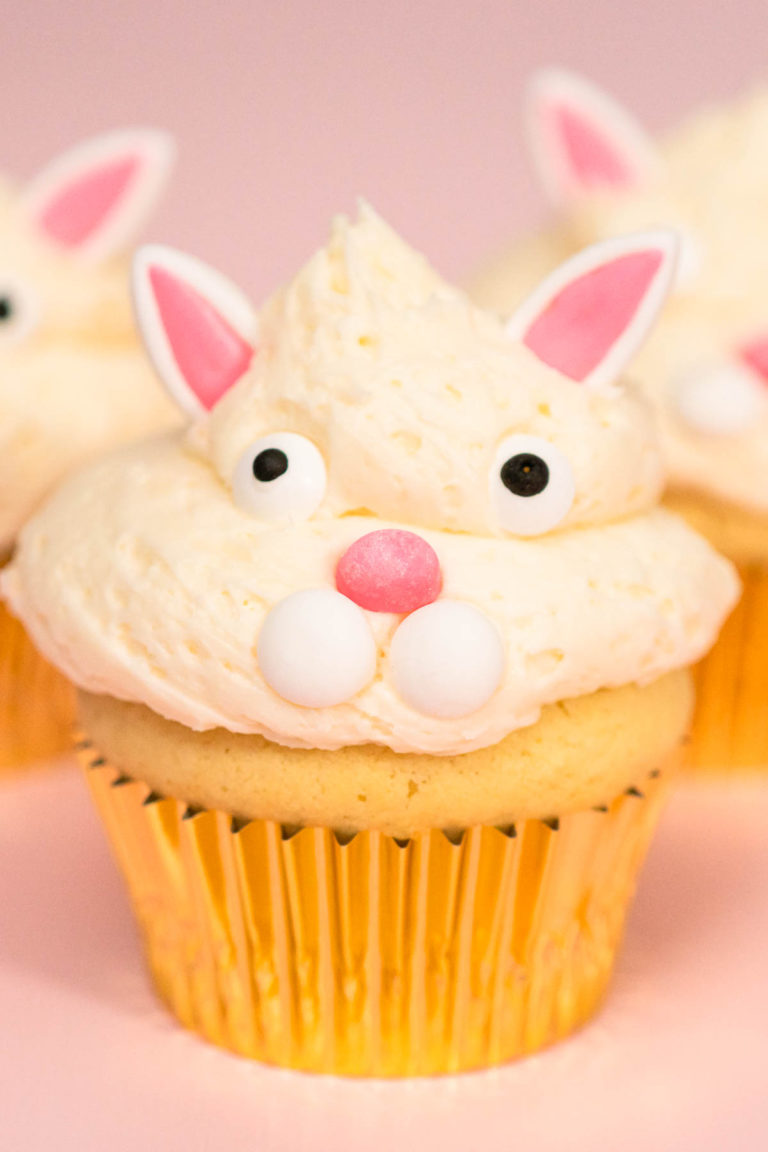
- Easter Bunny Cupcakes


Temperature Ranges for Melting Chocolate
Easter Chocolate Covered Pretzel Bunnies and Ducklings
Equipment
Ingredients
- ½ cup Yellow candy melts
- ¼ tsp Coconut oil
- ½ cup White candy melts
- ¼ tsp Coconut oil
- ¼ cup Orange candy melts
- ⅛ tsp Coconut oil
- ¼ cup Pink candy melts
- ⅛ tsp Coconut oil
- 1 bag Mini Candy Eyeballs
- 1 bag Mini pretzels
Instructions
- First, prepare and measure out all of your ingredients. Then, go ahead and line a baking sheet with a parchment paper sheet or wax paper.Make sure the baking sheet you choose can fit flat in your freezer or fridge.I like to go ahead and pour my bag of pretzels into a large bowl for easier access when it’s time to line them out.
- Next, line the candy melting pot with the Dual Melting Pot Insert. Pour the white candy melts in one side and the yellow candies in the other side. Drop in the coconut oil to both the yellow and white candies.
- Melt the candies and oil together on high and stir regularly with separate heat resistant spatulas.
- Then, line several rows of mini pretzels along the parchment- lined baking sheet. When the candies have completely melted, it’s time to begin spooning the melted candy onto the pretzels.
- Spoon the melted candy onto the pretzels 2 at a time, then immediately drop the Mini Candy Eyeballs into place before the candy has a chance to start hardening. Repeat this process until all pretzels are coated, then transfer them to the fridge for 10-15 minutes.When spooning the yellow candy onto the pretzels, lift up your spoon from the chocolate to create a little peak where the little duckling wing will go.Half of these pretzels should be yellow for the ducklings and the other half white for the bunnies.
- Next, using a regular insert, melt the orange candies with some coconut oil in the candy melting pot.
- Melt them together on high and stir regularly with a heat resistant spatula.
- Then, transfer the melted orange candy to a piping bag and tie it off with a piping bag tie. Cut ⅛ inch from the tip of the bag for easy drizzling.
- Carefully use the piping bag of orange candy to draw little beaks onto all the yellow duckling pretzels. Then, rinse out the lining of the melting pot and repeat the candy melting process with the pink candy melts and coconut oil. Transfer the melted pink candy to another piping bag, just the same way, and use the pink candy to draw out the bunny ears and noses on the white candied pretzels.
- Let the candied pretzels harden in the fridge again for 10 minutes. Finally, after the candy has hardened completely, use the Black food pen to draw whiskers on the bunnies. Now you are ready to serve and enjoy!
Video
Notes


Leave a Reply